How to edit the map
Now you've got the basics, let's learn how to use a relatively simple editor called Potlatch 2. I have customised this tool to focus specifically on the features this map uses.
Introductory video
If you like, this video will take you through the basics. It might help to watch the video first, then read through this page and have a go yourself.
Creating an OpenStreetMap account
First things first, you need to create an OpenStreetMap account. Head over to the new account form and set yourself up. When you're done, come back here.
The customised editor
Open the editor using this link in a new window, then come back here. You should see something like this:
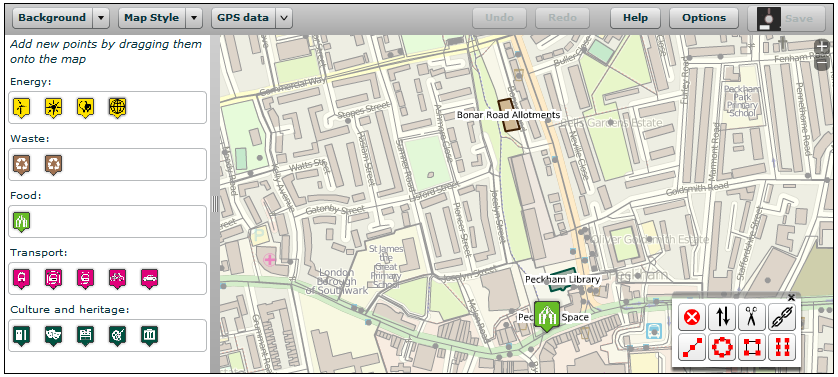
The main section shows the map with all of the features drawn on top of the background map as thin grey lines or little grey dots. In this customised editor, all the sustainability features show up as the icons or as more prominently drawn areas such as those allotments and the library.
At the top you have general controls that let you change the background (e.g. to aerial photography or an old out-of-copyright map); change the map style (e.g. away from our custom style to the OpenStreetMap default); show up any GPS data you might have gathered; read the help pages; change your options; and save anything you've done.
On the left you have the features that you can add and edit. If you've not got anything selected it shows "points of interest" you can drag and drop onto the map (but not areas, since you can't just drag and drop them on - you need to draw their shape). If you select a feature, it will show that feature's properties.
Getting around the map
These are some basic controls for Potlatch 2...
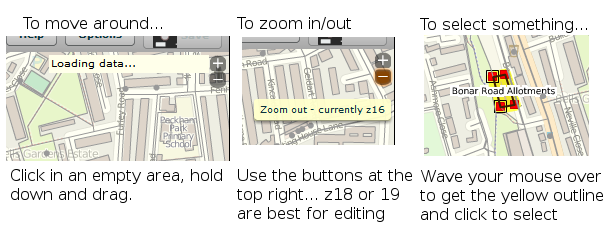
Have a go! Until you try to save your changes, you can't do any damage.
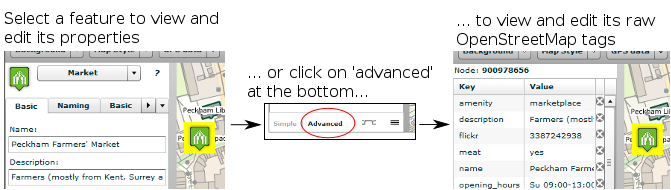
If you select a feature you can view and edit its properties using the left panel.
Adding a feature
If you've gone out and surveyed your local area and found (let's say) there's a geothermal heat pump nearby, then fire up the editor. Do not copy from other maps unless they definitely aren't copyrighted! So no to Google maps, council maps, etc.
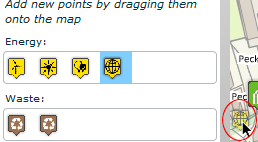
To add a point of interest simply drag the icon from the left panel onto the map, and drop it in the right location. Then add in the relevant properties and you're done!
To add an area such as some allotments or a building, zoom right in so you can easily draw the shape then just start clicking! Make sure you draw the shape as one continuous line from the first node to the final click that closes the area.
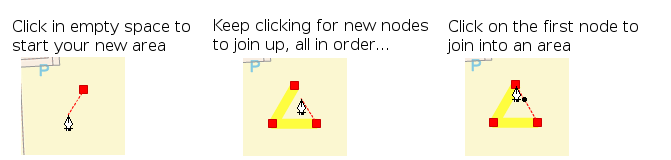
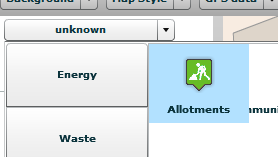
Once you've drawn the shape, click on the 'unknown' drop down in the left panel and choose the type of feature, then add in extra information like name, etc.
If you are drawing a complicated shape it's sometimes easier to start with something very simple, then drag the nodes into their right positions. You can also add new nodes in the middle of a line by holding down the 'shift' key and clicking on the line.
If you want to practice without worrying about mistakes, launch this practice editor that connects to a test server instead of the main OpenStreetMap server. You can mess about to your heart's delight without a worry!
When you're all done, save your changes
Click on the 'save' button at the top right to save your changes. If it's the first time you've used the editor, you will need to follow the instructions to authorise yourself with the OpenStreetMap web site.